If you would prefer to make a string art picture by hand yourself instead of buying a ready-made string art picture from us, we have a few tips for you here. WireStyle does not sell handmade string art or DIY kits, as the production methods and materials we use are not suitable for making by hand. However, making your own string art picture can still be a fun and creative project. Here is a step-by-step guide:
Materials:
- Wooden board or a stable base (e.g. cork board)
- Nails (preferably with flat head)
- Hammer
- String or yarn in different colors
- Template or image you want to recreate
- Adhesive tape (optional)
- Pencil
Step-by-step instructions:
-
Prepare template:
- Choose a motif for your string art picture. Simpler designs are better to start with.
- Print out the template or draw it on a piece of paper.
-
Prepare the base:
- Place the wooden board or base on a stable work surface.
- If you want, you can paint or varnish the wooden board beforehand.
-
Attach template:
- Attach the template to the wooden board with tape to prevent it from slipping.
- If you are not using a template, draw the motif directly onto the wooden board with a pencil.
-
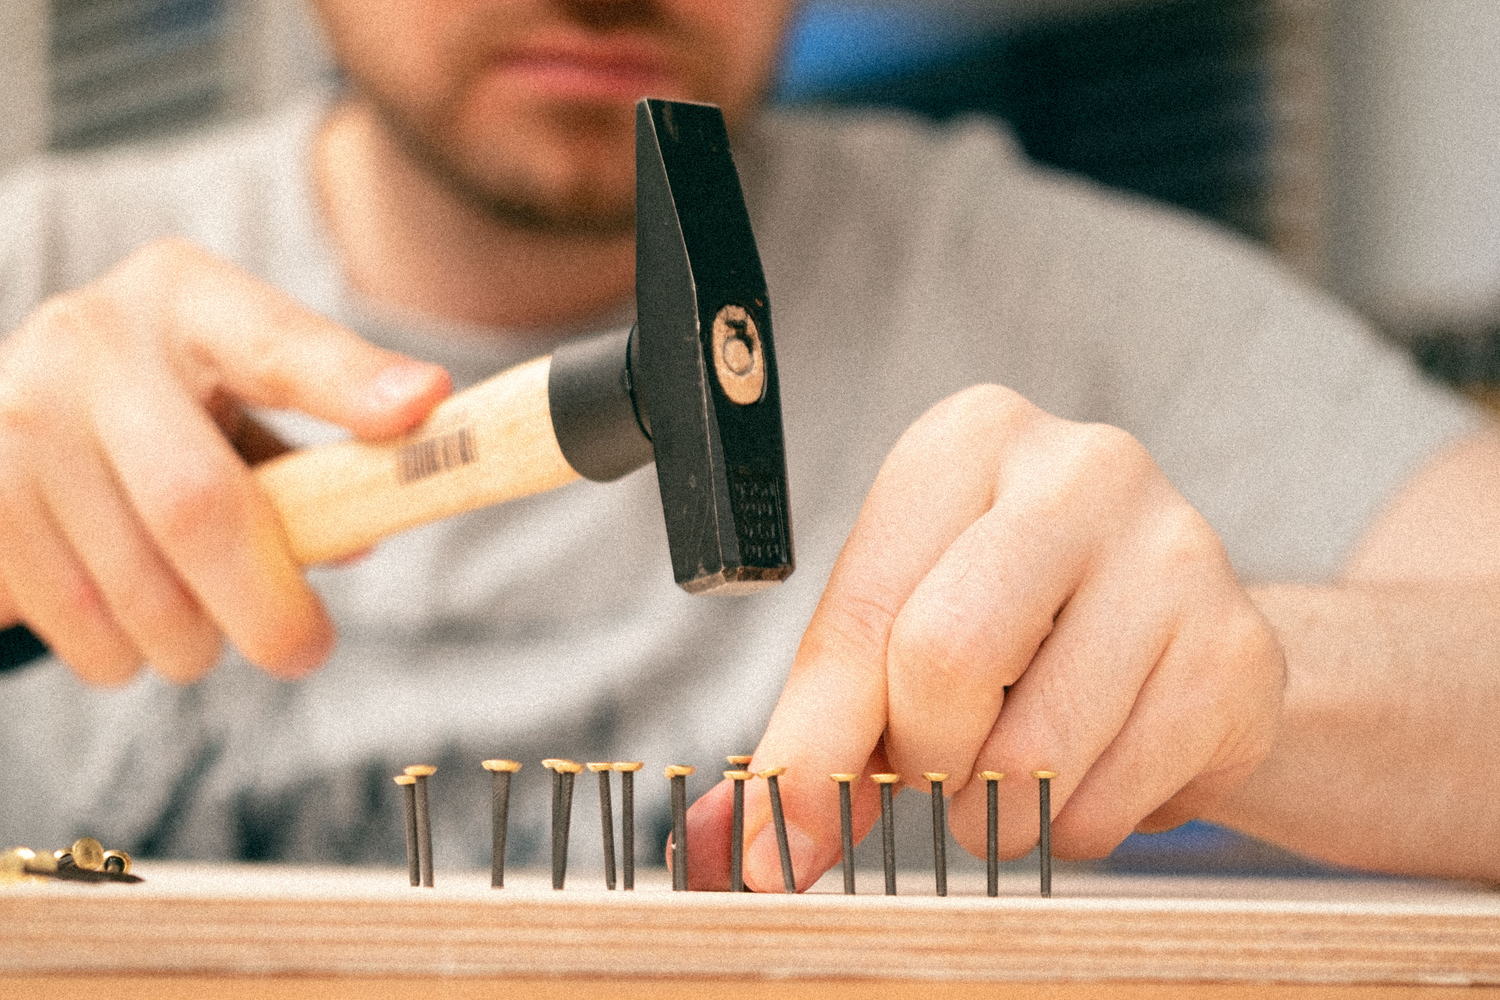
Hammering in nails:
- Hammer the nails into the board along the contours of the template. The nails should be evenly spaced and not too far apart.
- Leave about 1 cm of the nail head sticking out above the board.
-
Remove template:
- After all nails are hammered in, carefully remove the paper template.
-
Attaching the string:
- Choose a string or yarn in a color of your choice.
- Tie the string to a starting nail.
- Wrap the string around the nails by stretching it from one nail to the next. There are various techniques possible here:
- Recreate contours: Guide the thread along the contours to emphasize the shape of the motif.
- Fill areas: Stretch the thread across the motif to fill areas. This can be done randomly or systematically.
- Vary the string direction and colors to create interesting patterns and effects.
-
Fix the string:
- When you are satisfied with the string pattern, tie the end of the string to a nail.
- Cut off any excess string.
-
Optional: Frame or protection:
- You can frame your string art picture or cover it with a protective varnish to make it more durable.
Tips:
- For a more professional look, make sure the strings are taut.
- Start with simple geometric patterns before moving on to more complex designs.
- Use different thread thicknesses and colors to create depth and texture.
Have fun creating your own string art picture!
If you don't want to make your own string art picture by hand, but would rather buy a ready-made, photo-realistic string art picture, you can upload a photo to the WireStyle configurator. There you will immediately get a preview of what the string art picture will look like.
You can find more information about how WireStyle's string art pictures work on our website. Pre-produced motifs are also available there if you don't want to order an individual motif.

